Mantex

Tutorials, Study Guides & More

  • HOME
  • REVIEWS
  • TUTORIALS
  • HOW-TO
  • CONTACT
>> Home / How-to / How-to guides

How-to guides

How-to guides, glossaries, timelines, bibliographies, and free lessons

guides, glossaries, timelines, bibliographies, and free lessons

How to Write Good

March 19, 2015 by Roy Johnson

tips for guaranteed success with words

How to Write Good is a little catalogue of wisdom written by Frank L. Visco. It was originally published in the June 1986 issue of Writers’ Digest, where he claimed: “My several years in the word game have learnt me several rules.”

  1. Avoid alliteration. Always.
     
  2. Prepositions are not words to end sentences with.
     
  3. Avoid cliches like the plague. (They’re old hat.)
     
  4. Employ the vernacular.
     
  5. Eschew ampersands & abbreviations, etc.
     
  6. Parenthetical remarks (however relevant) are unnecessary.
     
  7. It is wrong to ever split an infinitive.
     
  8. Contractions aren’t necessary.
     
  9. Foreign words and phrases are not apropos.
     
  10. One should never generalise.
     
  11. Eliminate quotations. As Ralph Waldo Emerson once said: “I hate quotations. Tell me what you know.”
     
  12. Comparisons are as bad as cliches.
     
  13. Don’t be redundant, don’t use more words than necessary, it’s highly superfluous.
     
  14. Profanity sucks.
     
  15. Be more or less specific.
     
  16. Understatement is always best.
     
  17. Exaggeration is a billion times worse than understatement.
     
  18. One-word sentences? Eliminate!
     
  19. Analogies in writing are like feathers on a snake.
     
  20. The passive voice is to be avoided.
     
  21. Go round the barn at high speed to avoid colloquialisms.
     
  22. Even if a mixed metaphor sings, it should be derailed.
     
  23. Who needs rhetorical questions?
     
  24. Abjure polysyllabic obfuscations.
     
  25. Finally, chech for pselling errors and typeos.

How to Write Good Also see 26 Golden Rules for Writing Well

Most writing guides will give similar advice – but without the fun. Here is a collection of style guides for different types of writing – from academic scholarship, to business communications and commercial report writing. These guides cover topics such as word choice, clear expression, grammar, syntax, and case agreement, plus punctuation, editing and proof reading. It’s important to note that there are specific style conventions for different types of writing. What works for scientific writing may not be suitable for an engineering report or a business proposal.

How to Write Good Writing Guides


More on writing skills
More on creative writing
More on grammar


Filed Under: How-to guides, Writing Skills Tagged With: Business, English language, Writing skills

How to write memos

October 29, 2013 by Roy Johnson

guidance and writing skill for a common office document

What are memos?

The term memo is short for ‘memorandum’. Their purpose is to give information in a brief form.

Memos can be seen as notes, very brief letters, or micro-reports.

A memo is usually very short – a few lines or paragraphs at the most.

Memos

Some memos are even distributed on slips of paper.

Organisations usually have a recognisable form and layout for all internal memos.

Most memos are notices which pass between colleagues, sometimes within departments or to other departments or other sites.

The Internet has become a very popular medium for the memo. This is probably due to its brief format. Email messages can be seen as electronic memos in most business instances.

Memos should have a main heading stating the subject of the message, and sub-headings which lead into the message sections.

Memos usually bear the generic heading ‘MEMO’ at the top of the page. This acts as an advanced organiser so that the recipient is in no doubt of the document type and function.

The information in a memo should be set out in order of importance, with the most important item listed first.

Remember that effective business communication operates on the ‘punchline first’ principle. [It is only in a whodunit story or a narrative joke that we appreciate the withholding of vital information.]


Memos – the content

A memo should always contain the following information.

  • The subject of the memo
  • The name of the sender
  • The name of the recipient(s)
  • The date of posting
  • The message itself

Memos – types

There are various types of memo. These are the most commonly used.

  • Information
  • Announcement
  • Update

Information memos

An information memo provides information that is relevant to the recipient, or it replies with information that has been requested. The memo subject is stated in the title.

MEMO

SUBJECT
DATE
TO
FROM
Quote for Budget Projections
18 February 2006
J. Brown, Training Manager
G. Thwaite

Background

You requested a quote from a printer to use in your budget projections on the current project.

Quote

The cost for printing 1000 brochures in the dimensions you cited will be approximately £2,000.

Source
I obtained this information from Streamline Printers.

Scheduling
Though you did not ask about scheduling, the information manager of Streamline printers stated unequivocally that you must allow three weeks from the date of delivery of camera-ready copy.


Announcement memos

A meeting announcement memo is one sent by an individual or department to other individuals, departments, or company representatives to advise them of a forthcoming meeting.

These usually contain the date and agenda of the meeting, although, they may simply announce the date.

MEMO

SUBJECT
DATE
TO
FROM
Meeting about Sundeal Hotels
21 March 2001
Members of the Executive Committee
D. Henderson, Chair of Neatfit

Purpose
This meeting will consider a joint venture between Belsize Amusement Parks and Sundeal Hotels.

Time
The meeting will be held on 26 March at 9.30 am.

Place
The Board Room has been booked and refreshments will be served.

Agenda
The meeting will include two sessions.

General session (10.00 am to 12.00 am)

  • introductions of board members
  • AAAP Presentation
  • financial summary
  • questions and discussion

Executive session (1.15pm to 4.00 pm)

  • fiscal status Sundeal Hotels
  • decisions and recommendations

Confirmation
Please confirm your attendance by contacting Mary Golding Ext. 234

Attachments
The following documents are attached:

  • AAAP Annual Report
  • financial summary
  • preliminary paper on Joint Venture

Update memos

Update memos are notes which are transmitted between colleagues on a regular or frequent basis.

Because of the nature of the relationship of the authors, these are often quite brief and informal.

These are the sort of office communications that are now largely conducted via email messages.

MEMO

SUBJECT
DATE
TO
FROM
Help me out!
12 March 1999
Jean
Sally

Quick! I need a list of all our products containing Zinc.

Sorry to dump on you like this but it’s more than my job’s worth to miss the deadline. (Tues)

Let’s have a coffee later in the week.


MEMO

SUBJECT
DATE
TO
FROM
Staff Outing
19 December 2012
Brian
Trevor

Hi

I went to the Steering Group meeting yesterday and the subject of the staff outing came up.

Could you let me have some ideas for a venue and flesh it out with a bit of detail?

Alton Towers was suggested but I’d prefer something more adult myself.

Cheers,

T


MEMO

SUBJECT
DATE
TO
FROM
Interview Panel
12 October 2013
Brenda
Geoff

Dear Brenda

Glad to tell you you’re on the interview panel for the new PA job.

Interviews start at 9-30 next Weds. I’ve sent you the CVs of those shortlisted and hope you have time to go through them in time.

Wear your best frock and put them through their paces.

See you then

G

© Roy Johnson 2014


More on How-To
More on literary studies
More on writing skills


Filed Under: How-to guides Tagged With: Business, Communication, Information design, Writing skills

How to write numbered lists

July 11, 2012 by Roy Johnson

tutorial, guidance notes, tips, and conventions

Numbered lists – definition

Numbered lists are used when it is important to draw attention to individual items in a group. They are also used to emphasise an ordered sequence.

Putting items in a numbered list helps a reader to see them both individually and as group. Both can be seen at the same time. Here’s an example:

Our main branch stocks –

  1. electrical goods
  2. household furniture
  3. domestic appliances
  4. leisure and sportswear
  5. fashion and accessories

You can see that the list reveals these different categories of goods more clearly than if the same information is presented in a sentence, with the items separated by commas.

Our main branch stocks electrical goods, household furniture, domestic appliances, leisure and sportswear, fashion and accessories.


Sequence in numbered lists

Numbered lists are especially useful if it is important that the items follow a particular sequence. Here’s an example from a recipe:

Basic scrambled eggs

  1. Melt two ounces of butter in a pan.
  2. Beat two fresh eggs in a bowl.
  3. Add one third of a cup of milk.
  4. Add a pinch of salt and pepper.
  5. Whisk until frothy.
  6. Pour mixture into pan.
  7. Stir continuously until semi-firm.

Parallelism in lists

Numbered and bulleted lists work best when each of the items listed is expressed in the same way. This is known as grammatical parallelism. In the example above, notice that each item begins with an action verb (Melt, Beat, Add) followed by the instruction.

In the next bad example, the items are expressed in a variety of grammatical forms. This blurrs the message being conveyed. In fact the items are also different in kind, because some are instructions, whilst others are information.

Fire regulations [BAD example]

  1. When the fire alarm goes off, you should leave the building.
  2. DON’T use the main stairway, as this could be dangerous.
  3. All fire exits are clearly marked.
  4. The main assembly point is located behind the warehouse.

Punctuation of lists

If the items in the list are expressed as complete sentences, they should be puctuated in the normal way. This means starting with a capital letter and ending with a full stop.

Health and safety regulations

  1. All doors must be locked by 6.00 pm.
  2. Smoking is not permitted in the building.
  3. All staff must be trained in the new fire regulations.
  4. No personal belongings may be left in the office overnight.

If the list items are sentence fragments, short phrases, or single words, there is no need to follow the normal rules of punctuation.

You will need five tools to complete this task:

  1. a screwdriver
  2. a hammer
  3. a spirit level
  4. a pair of pliers
  5. a measuring tape

Indentation of lists

It is common for numbered lists to be shown indented from the rest of the text – as they are on this page.

You can do this manually using the INDENT or TAB key on your keyboard. If you are using Microsoft Word, it will try to take over this process from you, indenting and numbering each sucessive line. This can be very annoying.


Nested lists

Sometimes it may be necessary to have a list within a list. This sometimes happens in lengthy and complex reports.

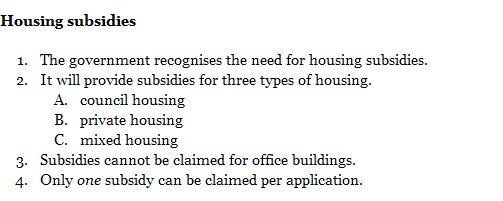
There are three key issues to be observed in cases of nested lists:

  1. The same general rules of presentation apply.
  2. Indetation is increased to include double indentation.
  3. The nested list needs a different system of numbering.

The secondary system of numbering should be easily distinguishable from the first. Use Roman numerals if necessary. If the numerical ordering is less important, it might be better to use an alphabetical system (a, b, c) or even revert to a bulleted list.

Numbered lists


Numbering systems

The numbers shown in a list can be offered as Arabic numbers (3, 4, 5, 6) or as Roman numerals (VII, XII, IV — or — iii, iv, v, vi). Avoid using Roman numerals unless you have a pressing need to do so, because this gives the reader extra work in comprehension.

Most word-processors will have this numbering feature automated. In Microsoft Word for instance, look under Paragraph -> Numbering.

There is not much point in having a list of items which goes into double figures or beyond. Readers will not be able to remember the order of the items. An exception can be made if it is a document that will be printed and used as a reference guide.

© Roy Johnson 2012


More on How-To
More on literary studies
More on writing skills


Filed Under: How-to guides Tagged With: numbered lists, Punctuation, Reports, Writing skills

How to write scientific reports

September 16, 2009 by Roy Johnson

conventions, structure, and form of reports

What are scientific reports?

Introduction

The purpose of this guidance note is to explain the criteria for assessment of English language skills in a written report.

1) It outlines the criteria of assessment
2) It summarises what a report is expected to contain
3) It comments on how you can help the reader

1. Criteria for assessment
  1. Communicative quality: is it easy to read?
  2. Ideas and organisation: is the information appropriate and clearly organised?
  3. Grammar and vocabulary: is there a good range of language used so that the meaning is clear and the text is not repetitive?
  4. Surface features: is the punctuation and spelling accurate?
2. What are scientific reports expected to contain

This section looks at the contents of the report structure, and presentation.

Structure

The structure of a report will normally consist of the following items as
a minimum:

  • title
  • authors
  • abstract
  • summary
  • table of contents
  • body of report
  • conclusion
  • references

You need to adjust these sections to suit the purpose of the report. But
each section has a particular role, as follows.

The title – tells the reader directly and at first glance what it is that you are discussing.

The abstract or summary and table of contents – gives the reader an overview of the report and a list of section headings. From these, they can see the points included and decide which ones to look at.

The body – consists of the introduction and component sections.

The introduction should state the purpose of the report and show that you are aware of its terms of reference. That is, you should say what the subject is, and what is its purpose. You should also state any method(s) used and any limitations, and finally indicate how the report is structured. It is important to justify, or say why you are writing the report. You should also give the reader a mind map of what is coming.

Sections of the report should be organised under headings. This forces you to classify information and helps you to remain relevant – in case you are likely to wander off the point.

The conclusion – starts by referring back to the purpose of the report, states the main points arising, draws conclusions, and possibly makes recommendations.

References and appendices. These list the material referred to in your work. Follow any guidelines on format for presentation of references. Appendices provide additional material not included in the text.

Layout and presentation

Layout and presentation involves matters ranging from clear title and section headings, to accurate spelling and punctuation. You must think of your reader. Presenting accurate text is equivalent to speaking clearly. Since you are not around to explain any problems to your reader, editing and checking your text is extremely important.


Scientific reportsJudith Bell, Doing Your Research Project: A Guide for First-Time Researchers in Education and Social Science, Buckingham: Open University Press (2nd edn) 1993, pp.176. Best-selling UK guide which covers planning and record-keeping, interviewing, reviewing ‘the literature’ of your topic, designing questionnaires, interpreting evidence, and presenting the findings. Each chapter has a summary checklist and its own suggestions for further reading. There’s also a full bibliography and index.
Buy the book from Amazon UK
Buy the book from Amazon US


3. How can you help the reader?

Apart from the points raised above about structure, layout, and presentation, the main tool you have is obviously the language. There are two main points to make: the first is about what we call “signposts”, the second about style.

Signposts

Apart from section headings, you can select language which gives your reader signposts to what you are trying to explain. Signposting helps the person read the text quickly by highlighting the main points and the logic of the argument or discussion. Some examples follow.

1. The first section of your report could start with “The aim of this report…” or “The aim of this project…”

2. Within the first section, the stages could be introduced with “The first stage is…”, “The second stage…”, “This section deals with…”.

3. When you want to give an opinion or evaluate something, you might signpost with “The problem with this is…”, “What is significant about this is…”, “It is important to remember that…”

4. To show that you are drawing a conclusion, introduce the point with “This means that…”, “The result shows that…”, “It is likely that…”

Style

Style means the tone of language you use to address the reader. There are three points to make. You should avoid repetition, avoid a narrative style, and avoid vague language.

Repeat only what is necessary. That is, key words or technical terms. The reader has a memory. To flatter this, you can introduce your repeated point with words like “As mentioned earlier…”, “As discussed above…”

Although it is acceptable to use “I” or “we” in a report, too many sentences with “I” and “we” become repetitive. Avoid: “I had to…” Use: “It was necessary to…”

The reader does not wish to know about everything that happened, but rather your objective assessment of the situation. Avoid: “First we discussed…then we decided…” Use: “The first step was to discuss…It was decided…”

Be precise and be specific. Avoid: “There was a problem so we…” Use: “A problem arose with … which meant it was necessary to…”

Conclusion and recommendations

Read over what you have written and check it against the guidelines. Pay particular attention to punctuation and spelling.

With thanks to Esther Daborn

© Roy Johnson 2004


More on How-To
More on literary studies
More on writing skills


Filed Under: How-to guides, Study Skills Tagged With: Business, Communication, Report writing, Research, Scientific reports, Writing skills

How to write surveys

October 28, 2013 by Roy Johnson

skills for planning, designing, and writing surveys

What are surveys?

Surveys are usued to gather statistical data, first-hand evidence, or customer feedback and opinions.

Surveys are commonly used to gather information about

  • voting preferences during elections
  • government public health surveys
  • market research on commercial products
  • public opinion on controversial social changes
  • population surveys and census taking
  • data for an academic project or test

Surveys

Surveys are often a form of specialist product research. They are often created by someone who has been trained in market research.

Graduates in Economics, Psychology, Sociology, Mathematics, or Business Studies are often asked to construct and evaluate the results of a survey as part of their coursework.

However, people working in other disciplines are increasingly asked to write surveys as part of their work.


Surveys – the process

If you attempt your own survey, you need to be aware of the procedure outlined here in this example.

  1. Establish the goals of the project – What you want to learn
  2. Determine your sample – Whom you will interview
  3. Choose interviewing methodology – How you will interview
  4. Create your questionnaire – What you will ask
  5. Pre-test the questionnaire, if practical – Test the questions
  6. Conduct interviews and enter data – Ask the questions
  7. Analyze the data – Produce the reports

Surveys – Example

Statement of objectives

I intend to find the main reasons why Mighty Box is more popular than Pink Bucket as a gift container in the north west of England.

Rationale

The results of this survey will inform the marketing team regarding the next advertising campaign due to start 18 May 2014.

Methodology

I will carry out my research by distributing survey sheets to 5000 consumers.

I will create a database which will analyse my results in terms of a stated hierarchy of preferences and reasons.

Implementation

My consumer profile comprises women aged 25-50 in social groups C2 and D.

Location

My survey will be carried out in 17 shopping centres in the north west.

Human resources

I will employ experienced market research personnel in each of the target areas.

Costings

17 researchers @ £7 per hour x 18 hours = £ 2,142.00

Database technician @ £150 per day x 2 days = £ 300.00

Analyst @ £20per hour x 40 hours = £ 600.00

Total cost £ 3,042.00


Surveys – the two main types

There are various purposes in carrying out a survey. Here are the two main types, categorised by the types of question posed – open and closed.

  • Open survey
  • Closed survey

Open questions – What are they?

Open questions are those that allow the respondent to make up their own answer and express it in their own words.

Here are some examples of open questions.

  • Describe your feelings about the rail-crash.
  • What is your current opinion of the NHS?
  • How do you deal with distressed patients?

Closed questions – What are they?

Closed questions have a prescribed answer, as in multiple choice questions. Yes or no answers follow closed questions.

Here are the same topics expressed as closed questions.

  • Do you feel angry, sad or depressed about the rail crash?
  • Do you agree that the NHS is declining in quality?
  • Are you able to control distressed patients?

When are open questions more appropriate?

  • In a survey, open questions yield more authentic opinions and therefore can widen the scope of a survey. This is because the participant may express ideas that you have not thought of.
  • If you are genuinely attempting to find out what a group of people do think or feel, open questions are effective.

When are closed questions more appropriate?

  • When you are seeking to categorise a set of known symptoms, behaviour, beliefs, or feelings, closed questions are more efficient.
  • When you are seeking a certain response, to a given idea, then closed questions can assist your project.

Surveys – Open

Enlightenment

This is an ‘open survey’ – one for which there is no preconceived notion of result.

In other words, you need the result to be as authentic as possible, otherwise it will have no value. You have no vested interest except to know the facts. You will use these facts to inform your next sales strategy or publicity campaign.

Constructing the survey content needs extremely careful thought, planning, and trialling. An inefficient survey can cost you dear.

The open survey. To find authentic information, questions of a very different order are required. Here are some examples of open questions.

Q: I see you have bought a Mighty Box. Please state in one sentence your reason for choosing it.
A: I chose the Mighty Box because it is easy to carry and it is suitable for boys and girls.

Q: Indicate how often you read women’s magazines.
A: Never – every week – every month – every three months.

Q: Tick the content of women’s magazines in order of your preference.
A: None – articles – stories – adverts – horoscopes – readers letters

Q: With which of the following magazines are you most familiar?
A: Hers – Glamour – Lifelong – Woman’s Groan – Modern Girl – none of these.


Surveys – Closed

Publicity and politics

This is a ‘closed survey’ which seeks to gather the information which will support a belief or a statement of belief. In this case you know at the outset what result you are seeking.

For example, if you are a toothpaste company and you want to use statistics in your advertising campaign, you need to find those people who already use your product and are happy with it.

If you want to convince your management team that the main office is in need of refurbishment, you might construct a survey which will give you results to convince them. In this case, you might even include some Health and Safety issues to create a more powerful effect.

The closed survey demands ‘closed questions’. These are most likely to give you the responses you seek. Here are some examples of closed questions with their predicted answers

Q: How long have you been enjoying Mr. Stipling’s cakes?
A: Ever since they came out in 1976.

Analytical statement: ‘X number of people stated that they had enjoyed the cakes for many years’.

Q: When you relax and read Woman’s Groan, what do you like best about it?
A: I only read Woman’s Groan for the horoscopes. I don’t read the rest of it.

Analytical statement: ‘In a recent survey, over X thousand women said they found Woman’s Groan relaxing.’


Surveys – Guidelines for user-friendliness

1. Decide at the outset which of two methods you will use:

  • hand over the questionnaire for each subject to complete
  • read out the questions and fill in the results yourself

2. If you hand over the questionnaire, you need to –

  • Make all your questions simple and clear
  • Make the text large enough to be legible in the street
  • Make the questions answerable with a tick or one word

3. If you decide ask the questions, you need to –

  • phrase questions so that they sound like a spoken sentence
  • keep the survey out of sight of your subject, so that they actually listen rather than read over your shoulder

4. Always explain the context and the purpose of the questionnaire.

5. Avoid including the individual’s identity, or if you need it in some cases, ask permission to include it.

6. Always thank your subject for co-operating with your research.

Processing your data

7. Creating a database is the best way of dealing with survey results. This way, you can find a variety of results which will be done automatically, saving you hours of manual labour.

8. A database will also help you to generate results that you may not have anticipated at the outset.

Using the data

9. Use the data to inform your activities in as many ways as possible. The authentic survey is extremely valuable for such purposes as

  • correcting an ineffective publicity strategy
  • checking on the efficacy or usability of a product
  • assessing public relations in your company
  • using ideas generated by your employees
  • checking on employee morale

10. When acting on the results of your survey, publish your results as an integral part of your action statements.

11. For example, if your survey has shown that employees are not happy with the level of Health and Safety in your organisation, state that you are responding to their input into the survey.

12. If, as a result of the survey you need to make changes to your product or service, give your employees the benefit of the survey results.

Expressing the results of your survey

13. Charts, diagrams or tables are better than narrative explanation when it comes to expressing survey results.

14. A graph or bar chart showing preferences makes a bigger impact than a page of written text on the subject.

15. There are many easy-to-use electronic applications for creating graphics such as those needed to express statistics. They work in conjunction with databases.

16.A spreadsheet such as Microsoft Excel can output its data in the form of bar-charts, columns, and pie charts.

© Roy Johnson 2014


More on How-To
More on literary studies
More on writing skills


Filed Under: How-to guides Tagged With: Academic writing, Business, Communication, Writing skills

How to write the minutes of meetings

October 20, 2010 by Roy Johnson

recording formal discussions and decision making

Minutes of meetings

Lots of organisations, groups, and businesses have meetings where a record needs to be kept of the proceedings and decisions made. Somebody in each case needs to write the minutes of meetings.

  • an informal meeting of hobby club members
  • the annual general meeting of a charity
  • a formal meeting of school governors
  • director’s meetings of small or large companies

Memos

The written record of these events are called the ‘minutes of meetings’.

The purpose of taking minutes of the meeting is more or less the same in each case – to keep an accurate record of events for future possible reference.

  • when it took place,
  • who was in attendance
  • who was absent
  • what was discussed
  • what decisions were made

The minutes of meetings are a record of discussions and decisions, and over time they might form an important historical record (in the case of a government’s war cabinet for instance).

There might also be a legal requirement for sets of minutes to be produced in an organisation – as in the case of a charity, a bank, or a limited company.


How much detail?

The amount of detail recorded will depend upon the type of meeting and maybe its historical culture. Some organisations like to have a record that captures the spirit of the discussions that took place; others put their emphasis on the decisions that are made.

One thing is certain: the person taking the minutes is not expected to give a dramatic or poetic description of what takes place. The minutes of a meeting are a summary, recording its most important features.

You can get an idea of the culture and style of the group by looking at the minutes of previous meetings. These will give you a guide to the amount of detail normally required and the way in which decisions are recorded.

Different types of meetings record these details in various styles. A group of parents running a children’s football team does not require the same degree of formality as a managing board of company directors. Roughly speaking, there are three types of minute taking

Informal

This might be no more than a bulleted list of points, a table with boxes to record deadlines, or a checklist of topics.

Minimalist

These will give a brief information on time-date-place, who was present, and details of decisions or resolutions passed. These can often be compressed onto a single side of A4 paper.

Detailed

A document of several pages, with headings and sub-headings, and maybe numbered points. These might provide a record of the discussion in summarized form, along with named individuals given specific responsibilities, plus any deadlines for action.


The Role of a Minutes Secretary

The minutes of a meeting are normally taken by the secretary, whilst the chair conducts the meeting.

It is the role of the chair to set the agenda, introduce items, and decide who speaks to the issues.

In a very big organisation the secretary might delegate the actual recording of events to an assistant or clerk.

It’s important that the minutes secretary follows the progress of the meeting carefully, recording major items of debate and decisions that are taken. The published agenda is a useful template by which to take notes during the meeting. This keeps the order of topics and the structure of the meeting intact.

For this reason the secretary and the chair need to work closely in collaboration with each other.

If a decision taken by the meeting is not clear, the secretary should ask the chair to clarify matters – which often helps other people as well.

Some types of meeting even require a record of who spoke to the issues on the agenda, and what points of argument they made. In such cases, a summary rather than a verbatim record is appropriate.


Writing the minutes of meetings

It is most likely that you will make rough notes during the meeting, then convert these to your finished report of the meeting after it has finished.

Remember that you are summarizing the most important issues, so you need to use a number of skills at the same time

  • good listening skills
  • the ability to summarize
  • good note-taking skills

Your job is to distinguish the less from the more important points of discussion. For this you can use your own system of abbreviations.


At the meeting
  • listen attentively, jotting down key words
  • use the agenda document as a template
  • leave enough space between items for your jottings
  • summarize what’s said, using a system of shorthand
  • ask for clarification if necessary

If the discussion was about The Allied and Providential Assurance Company for instance, you would not write out that name in full ever time. APAC would be a perfectly useful abbreviation in your notes.

Many people find it difficult to listen carefully and make notes at the same time. This becomes even more difficult if they are an active member of the meeting. For that reason a minutes secretary is not normally expected to participate as fully in a meeting as the other members.

If the meeting is not too big, you can probably record people’s contributions using their initials (KP, HT, MA) rather than their full names. You can also do this in any minutes so long as the names appear in full in the list of attendees.

The first time the name of an organisation is mentioned, it should be spelled out in full – as in Product Management Corporation, or the Queen Elizabeth Jubilee Trust. Thereafter, you can use acronyms formed by the initial letters of its name (PMC and QEJT). In very big meetings, these names and acronyms are often listed in an appendix.

Prepare in advance as much as possible. Make sure you have a copy of the minutes of the last meeting, and that they have been circulated to other committee members. Making a record of a meeting is always easier if you know the agenda in advance, and even if you know who might be in attendance.

Make sure you have a copy of the meeting agenda. Get to the meeting early so that you can record the names of other people as they arrive – if you know them.

If you don’t know the attendees, wait until the meeting has started, then circulate a blank sheet on which people are asked to PRINT their names. Don’t circulate this attendance sheet before the meeting starts, because if some people arrive late, the chances are that they will be missed.

It might happen that an item on the agenda is not discussed or is deferred for some reason until the next meeting. You should nevertheless record this fact, so that a future meeting is able to check on the status of the item and decide if it is still relevant.

Some meetings can generate discussions which become arguments, with differences of opinion expressed quite forcefully. A great deal of tact and diplomacy is required in recording such discussions.

The best way to deal with such occasions is to record the fact that there was disagreement, but without going into any details. You can use a form of words such as ‘There was disagreement concerning the choice of contractor for the project, but following discussion it was agreed that …’

Do not intrude any of your own opinions into the record of events. Your task is to appear neutral and impartial – even if you have strong feelings about hte topics being discussed.

Try to get agreement on the date of the next meeting before the meeting ends and people leave. That strictly is the chairperson’s job, but you will be doing yourself a favour in getting agreement on this issue.

If some points of the discussion are still not clear to you, it’s a good idea to ask speakers to clarify matters to you before they leave, otherwise you will have extra work in tracking this information when you come to write the formal minutes.


Cabinet plot against the Prime Minister – using the minutes


Notes on the Agenda

1. The name of the meeting or group

This can be very important in some cases – particularly if the minutes of the meeting will be circulated widely outside the group itself, or even to the public.

2. Those in attendance

The meeting might be composed of delegates or representatives from a variety of organisations. It’s the secretary’s job to note both their names and the organisations they represent.

List the names in alphabetical order. This avoids any suggestion of priority or importance.

3. Minutes of the last meeting

It is usual for these to be looked at briefly, with a view to making sure that everybody agrees they are a correct record.

It might be necessary to note the outcomes of any decisions taken on which action has been taken

Larger or on-going issues very often appear on the agenda of the current meeting, and discussion of them can be deferred until these items are considered.

4. Agenda item One

You should keep the notes for each agenda item separate and quite distinct from each other on the page.

Leave plenty of space between each of your notes.


Template for Meeting Minutes

1. Name of Organisation or group

2. Name of Meeting – it might be a regular meeting or one with a specific purpose

3. Date of Meeting

4. Names of those attending – plus their positions or the organisations they represent

5. Apologies for absence – those giving their apologies for non-attendance

6. Agenda item One – This is usually the minutes of the last meeting

7. Agenda item Two

8. Agenda item Three … and so on …

12. Date of the next meeting

13. Any other business

The papers for a meeting might normally include the following documents (depending on the formality of the meeting or group):

  • An agenda for the forthcoming meeting
  • The minutes of the last meeting
  • Attachments, reports, or letters

Committee members are given these papers in advance, and they are supposed to have read them all before they arrive at the meeting. That’s the theory – but the reality is often different.

People often start reading through these documents at the meeting itself, and asking questions about them – which is one of the many reasons that meetings take longer than they should. It is the job of the chair to impose discipline over such issues.


Writing up the minutes of meetings

You will be creating the minutes from your notes taken during the meeting. Here is one overwhelmingly useful tip on this part of the task: The sooner after the meeting you do it, the easier it will be.

That’s because your rough notes will make more sense, and you are not relying on your medium or long term memory to recapture any names or details of the discussion.

The structure of the minutes will mirror the meeting agenda.

Use the past tense (“Mr Parkinson outlined the plan”) and avoid use of the passive voice (“The plan was outlined by Mr Parkinson”).

Some organisations and groups like to draw attention to the decisions and outcomes by concluding the report of each agenda item with an action point. Here’s an example:

There was a discussion of the proposed alternative route and the impact it would have on local residents and businesses. It was unanimously decided that a formal challenge should be registered at the earliest possible date.

ACTION POINT: The treasurer Mrs Jones will seek volunteers to form a transport sub-committee, and Mr Davis as chair will contact the four local councillors and invite them to address the next meeting.


Sample minutes of meetings

Westleigh Maintenance Company Ltd

Annual General Meeting

Monday 19 July 2010

Present

Julie Culshaw, Mary Greenhalgh, Vera Sisson, Ingrid Kempster, Edward Kempster, Irene Rodger, Colin Rodger, Gerry Clarke, Edith Pickles, Pat Powell, Heather Pollitt, Roy Johnson.

Apologies

Manoj Hira, Reg Marsden, Lavinia Marsden, John Sillar

1. Minutes of the last AGM held on 22 July 2009 were accepted.

2. The accounts for the year ended 31 March 2010 were accepted.

Although these showed an overall loss, this was due to late maintenance payments, and these had since been paid.

3. Appointment of accountants

The finance director suggested that we remain with our current accountants, and this was accepted.

4. Appointment of directors.

The current directors were all standing for re-election. There were no nominations for new directors. The current directors were re-elected.

5. Appointment of company secretary

Julie Culshaw moved a vote of thanks and appreciation to the secretary and other directors in recognition of the amount of work they undertook on behalf of the Company.

Heather Pollitt was elected as secretary.

6. Increase in service charge

Because of the lack of any surplus to pay for improvements and maintenance, the directors recently looked into the possibility of arranging a bank overdraft. This was not pursued because of the cost and the excessive bureaucracy attached. The possibility of extraordinary payments was also discussed and rejected in favour of an increase in the service charge.

The meeting finally agreed that the directors should prepare a financial projection for the next one to two years, based on an increase in the annual service charge to somewhere between £1100 and £1200.

Any Other Business

7. Managing agents

The directors recently decided to end the relationship with the Guthrie Partnership as managing agents, because it was felt that the directors themselves were able to act more efficiently on behalf of Westleigh and its interests.

However, the advisory services of Alec Guthrie himself would be retained as and when required for legal purposes.

8. Maintenance

Directors had spoken to Dave Roberts, who agreed to act as a point of contact for local maintenance services. It was stressed that this did not represent an agreement to cover the costs of any works commissioned: these could only be met following agreement of the directors.

Gerry Clarke reminded the meeting that in cases where leaks from one apartment were affecting another, the costs of any repairs and redecoration were the responsibility of the owner causing the leaks.

9. Gardening

There was general dissatisfaction with the services provided by the current gardeners. A quotation from another local gardening service had been obtained, and it was agreed to change to this alternative service for a trial period once sufficient funds were available – probably towards the end of September.

10. Purchase of freehold

The purchase of the freehold was now complete, and Westleigh owners were in a position to either cease or continue making ground rent payments. Pat Powell suggested that the current payment should be included in the annual service charge, payable by one direct debit. This suggestion was accepted.

11. External re-decoration

The replacement of the finials, cleaning of driveways, and repainting of fascia boards was almost complete. A vote of thanks was extended to Edith Pickles for allowing the use of her garage for storage during these works.

The meeting concluded at 20.15

© Roy Johnson 2010


More on How-To
More on literary studies
More on writing skills


Filed Under: How-to guides Tagged With: Agendas, Meetings, Summarizing, Taking minutes, Taking notes

How to zip and unzip files

September 15, 2009 by Roy Johnson

what to do with compressed files

Zip files

redbtn Some files are compressed to make them smaller.

redbtn This process is also known as ‘zipping’ the files.

redbtn It also makes them quicker to download.

redbtn You can also zip up a number of different files into one – which is called an ‘archive’.

Zip Utilities

1. To deal with zipped files, you need a special program called a ‘utility’.

2. Two of the best known are UltimateZip and WinZip

3. They are often available free on magazine cover disks.

4. Alternatively, you can download from a free software site.

5. Go to tucows for instance. Look for ‘Compression Utilities’.

6. I use UltimateZip, which is free.

Downloading

1. Zipped files will have a .zip filename extension.

2. Click on the item you want to download.

3. Your browser will open a dialogue box.

4. You should then save the file – for example

C:TEMPfilename.zip

5. This puts the file into a folder called TEMP.


Unzipping files

1. Start up your zip utility program.

2. Choose FILEOPEN, and locate your zipped file.

3. In our example it’s C:TEMPfilename.zip

4. Choose EXTRACT FILES from the menu bar.

5. Extract files to C:SOMENAME

6. It all happens very quickly!

7. Then open a program which will read your files.

8. This could be a web browser for .htm files.

9. It could be MS Word for .doc files.

10. Don’t worry if anything goes wrong…just repeat the steps above.

Zipping files

1. First put your file(s) into a folder.

C:DEMO file-01.htm
file-02.htm
file-03.htm

2. This collection is sometimes called an ‘archive’.

3. Start up your zip utility program.

4. Select FILE/NEW – or FILE/New Archive.

5. Create a name for your zipped files.

newfiles.zip

6. Decide where to save your zipped files.

7. You can create a new folder, or use the existing.

C:DEMO

8. Then select and add all the files you wish to place in the zipped archive.

9. Press OK – and newfiles.zip is created.

10. The originals – file-01.htm, file-02.htm, and file-03.htm – are still in their folder C:DEMO

11. But you also have a copy of them, compressed into newfiles.zip

12. Have fun!

© Roy Johnson 2004


More on How-To
More on literary studies
More on writing skills


Filed Under: How-to guides Tagged With: archive files, compression, Computers, Study skills, Technology, unzipping, zipped files, zipping, zips

HTML Tutorial 01 – contents page

November 22, 2009 by Roy Johnson

• HTML – made simple

• HTML – page template

• HTML – common tags

• HTML – common problems

• HTML – adding colour

• HTML – page anatomy

• HTML – questions of taste

• HTML – text & graphics

• HTML – adding tables

© Roy Johnson 2002


Filed Under: How-to guides, Study Skills Tagged With: Coding, HTML, HTML tutorial, Technology, Web design

HTML Tutorial 02 – code made simple

November 22, 2009 by Roy Johnson

1. You can produce web pages using a simple word processor such as Windows NotePad or WordPad. The files you produce should be saved with an .htm extension.

2. The files can contain text, colour, and pictures [even sounds] – but they also contains HTML code.

3. HyperText Markup Language (HTML) uses ‘tags’ to send instructions to a web browser that will ‘read’ the web page. The browser then arranges the appearance of the text on screen.

4. The tags are a code which is placed between angled brackets – <H1> Here is a level one Heading </H1>.

5. Note that the tags are placed around any text you wish to affect. They commonly begin with one tag <H1>, and then they are switched off with another, </H1>, which contains an olbique stroke.

6. <H1>Heading</H1> – shows headings raging from big and bold at size 1 – to 6 – which is quite small.

7. You can also change the size of text on the page from 1 to 6 by enclosing the text between FONT SIZE tags

<FONT SIZE=”4″>produce text size four</FONT>

8. Notice that in this case the numbers 1 to 6 range from small to large.

9. Browsers show text at SIZE=”3″ unless told to do otherwise.

10. You can also change the colour of the text on the page – but note that the tag requires the US spelling of COLOR.

11. The text between the tags will appear in colour:

<FONT COLOR=”RED”>some text in red</FONT>

12. The <P> tag inserts a double space to start a new paragraph.

<P>
Here is the text of one paragraph, which is shown to illustrate the use of the paragraph tag.
</P>
<P>
And this is the start of the following paragraph, which as you can see has been separated from the first with a space.
</P>

13. The <BR> tag forces text to start on the next line down.

Here is a short statement.<BR>
The tag has been used to force the next sentence to begin on a new line.

14. The <HR SIZE=1> tag inserts a Horizontal Rule. The size of the line goes from 1 (most narrow) upwards, with 3 as the default.

15. There are two types of list – ordered and unordered. These are created by using the tags <OL> and <UL>. The first automatically numbers the points in the list, the second creates bulleted points.

16. The items in the list are created by using the <LI> tag. Notice that each point is automatically indented.

17. This is an example of coding for an ordered list:

<OL>

<LI>List item number one</LI>

<LI>List item number two</LI>

<LI>List item number three</LI>

</OL>

This will be show on the screen as follows:

  1. List item number one
  2. List item number two
  3. List item number three

18. This is the coding for an unordered list:

<UL>

<LI>List item number one</LI>

<LI>List item number two</LI>

</UL>

This will be shown on the screen as follows:

  • List item number one
  • List item number two

19. Emphasis is added to text using the BOLD and ITALIC tags, which are shown as <B></B> and <I></I> respectively.

20. Here is some text which is shown in bold and then in italics.

21. You can combine tags – by making text both bold and italic for instance. Here is bold italics.

22. The tags must be correctly nested. That is, they must be added and removed in the correct sequence (or syntax).

<B><I>bold italics</I></B>

23. You can also insert an extra space by using the non-breaking space tag – &nbsp; (which does not come in angled brackets).

no spaces abcdefgh
extra spaces a   b   c   d   e   f   g   h

24. That’s a quick run through some commonly used tags. Here are some general tips on writing the code.

General points

  • You can type tags in upper case <FONT SIZE=4> or lower case <font size=4>.
  • Do not miss out any angled brackets <these> or quote marks “these” – or the code will not work.
  • Do not insert any spaces, as in <FONT C OLOR=RED> or the code will not work.
  • You can combine tags, but they must be correctly nested, as in <B><I>EXAMPLE</I></B>.

NB! This is an extremely simplified account of HTML coding. The appearance of most web pages these days is controlled by style sheets. But the principles shown here are still working underneath.

© Roy Johnson 2002

previousnext


Filed Under: How-to guides, Study Skills Tagged With: HTML, HTML tutorial, Technology, Web design, Web design tutorial

HTML Tutorial 03 – page template

November 22, 2009 by Roy Johnson

1. A basic web page is fairly simple. You should COPY then SAVE the template shown below.

2. Copy the template into a word-processor, then save the file as template.htm.

3. Use a very simple word-processor, such as Windows NotePad or WordPad. Others, such as Microsoft Word, will try to add its own HTM code – and that will be confusing.

4. Then open the file template.htm, add your own text to the page, and SAVE AS filename.htm, where ‘filename’ is a word of your choice.

5. Give it a name, don’t leave any spaces, and use all lowercase letters. That is, avoid using capital letters in web page filenames.

6. You can view the results by opening the page in your web browser.

7. To do this, go to FILE then OPEN PAGE, and type the pathname into the dialogue box. Alternatively, use the Browse feature to locate your file – filename.htm.

8. Don’t type the statements between the square brackets.


<HTML>

<HEAD>

<TITLE>

[ Insert the title of your page here ]

</TITLE>

</HEAD>

<BODY>

<H1>

[ Insert the main heading of your page here ]

</H1>

<P>
[ Start the text of your page here ]

</P>

<P>
[ Insert more writing here ]
</P>

</BODY>

</HTML>


© Roy Johnson 2002

previousnext


Filed Under: How-to guides, Study Skills Tagged With: HTML, HTML tutorial, Technology, Web design tutorial

  • « Previous Page
  • 1
  • …
  • 5
  • 6
  • 7
  • 8
  • 9
  • …
  • 11
  • Next Page »

Get in touch

info@mantex.co.uk

Content © Mantex 2016
  • About Us
  • Advertising
  • Clients
  • Contact
  • FAQ
  • Links
  • Services
  • Reviews
  • Sitemap
  • T & C’s
  • Testimonials
  • Privacy

Copyright © 2025 · Mantex

Copyright © 2025 · News Pro Theme on Genesis Framework · WordPress · Log in