Mantex

Tutorials, Study Guides & More

  • HOME
  • REVIEWS
  • TUTORIALS
  • HOW-TO
  • CONTACT
>> Home / Archives for HTML

Create your First Web Page in a Weekend

June 3, 2009 by Roy Johnson

well-planned tutorials on HTML design basics

Can it really be done in a weekend? Well, if you set some time aside and follow the tutorials in this clearly-written guide, it’s possible that you could have a few decent pages up within the forty-eight hours. Steve Callihan kicks off with some background explanation of Web matters, and information on what you’ll need. This is designated as what you might do as preparation on ‘Friday night’. On Saturday morning there’s a first step-by-step tutorial on HTML code basics. This is followed by tips and tricks which will help you to control the layout and appearance of your Web pages.
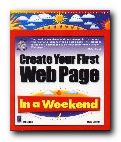
First Web PageThe Saturday afternoon tutorial covers graphics, wrapping text around images, and how to deal with the tricky issue of browser-safe colours. Everything is spelled out very clearly, strictly one topic per paragraph, and everything clearly labelled and well illustrated. Assuming that you don’t go out on Saturday evening, it is devoted to learning the mysteries of tables. Then during the rest of the weekend you put what you have learned into practice by making a small web site. There is quite a heavy emphasis on graphics, so this will appeal to people interested in such visual effects as drop shadows, decorated text, and creating your own 3-D buttons.

When that is done, he shows you how to get your site up onto the Web, and there are bonus extras on those items which seem to be popular with beginners – hit counters, guestbooks, image maps, and animated gifs.

This book is in its third edition – so the basic approach has obviously been successful. To be truthful and realistic, I would suggest spending at least a week reading it and absorbing what it has to say first. Then a weekend at the keyboard might yield decent results. And if you need extra help, there are plenty of page templates, plus lots of free software on the accompanying CD-ROM.

© Roy Johnson 2000

Buy the book at Amazon UK

Buy the book at Amazon US


Steve Callihan, Create your First Web Page in a Weekend, (third edition) Rocklin, CA: Prima Publishing, 1999, pp.425, ISBN 0761524827


More on web design
More on digital media
More on technology


Filed Under: Web design Tagged With: HTML, Technology, Web design

Dreamweaver The Missing Manual

July 8, 2009 by Roy Johnson

complete manual and guide to popular web editor

The ‘Missing Manual’ series is the brainchild of best-selling author David Pogue. These guides provide printed instructions for software normally issued without them. Dreamweaver seems to be the web design tool of choice for both serious amateurs and professionals. It offers lots of powerful tools which allow you to control everything from the details of page design to larger issues of style sheets, JavaScript interactivity, and Web management. Dreamweaver is to web pages as a word processor is to normal documents. That is, it has multiple commands which format the page in any way you wish. And the good thing is, you don’t have to learn any of the underlying code.

Dreamweaver 8 The Missing Manual You can preview the results in multiple browsers – whichever you have installed. This manual covers all the conventional topics of web design – tables, frames, links, text formatting, and layout – but without once discussing the hieroglyphics of coding which must deter so many people wishing to design their own pages. It also deals with the more advanced features of web design, using style sheets, forms, layers, and multimedia such as Flash and Shockwave.

I think this is what has made Dreamweaver so popular – it caters for the amateur who doesn’t need to learn code; the semi-pro who needs power tools on a reasonable budget; and even the pro who wants site maintenance and management. It handles all these levels of task with ease.

Dreamweaver has lots of terrific features – such as a tool which will convert tags from upper to lower case – that is from from <B> to <b>. Why is this important? Because XML – to which we’re all heading – requires lower case tags. This makes it a powerful conversion tool, amongst other things.

There’s even a feature for re-organising existing sites which will automatically update all your links and folders. In addition, you can run a site past the program and it will show you any orphaned pages and broken links. These are excellent features for both amateur and professional users.

David McFarland’s explanations are painstaking and thorough, and these Missing Manuals are produced at O’Reilly Associates – which guarantees high quality production values.

© Roy Johnson 2006

Buy the book at Amazon UK

Buy the book at Amazon US


David McFarland, Dreamweaver: The Missing Manual, Sebastopol (CA): Pogue Press/O’Reilly, 2006, pp.960, ISBN: 0596100566


More on web design
More on digital media
More on technology


Filed Under: Web design Tagged With: Dreamweaver, HTML, HTML-XML-CSS, Web design

Fresh Styles for Web Designers

June 8, 2009 by Roy Johnson

new web design strategies and techniques

So far, web design theory has been split between usability minimalism as urged by gurus such as Jakob Nielsen at one end of the spectrum, and the bandwidth-hogging graphic designs of David Siegel at the other. Now Curt Cloninger suggests we can combine the two approaches – and he shows how it can be done. This is one of those Web strategy guides which assume you know the details of designing pages.

Fresh Styles for Web Designers What it offers is a survey of new strategies in structure and graphic presentation – some of them on the edge of the avant garde. Cloninger takes the line that these are the early days of the Web, that there are severe limitations on what is possible, but that inventive designers will embrace the limitations and turn them into positives.

The reasons he offers are that not all sites are driven by e-commerce or a desire to maximise hits. Some are exhibition or display sites; galleries or individual portfolios of work – something like an elaborate visiting card. There is no reason why such sites shouldn’t indulge themselves with the sorts of glamorous graphics and ‘entry pages’ supported by designers such as David Siegel.

He categorises sites as ‘Gothic’, ‘Grid-based’, ‘Grunge’, ‘Mondrian poster’, ‘Paper Bag’, and ‘HTMinimaLism’ – and despite his post-hippy approach these distinctions do eventually make sense. Designers in these camps treat the page design, the Web strategy, and the visitor experience in significantly different ways.

One of my favourites was the minimalist style – sites from the competition www.the5K.org which feature pages of games, puzzles and art collections the total size which must come in under five kilobytes. [Try it!] The other was the sci-fi look of what he calls ‘Drafting/Table Transformer’ style led by Mike Young, whose work is featured in the recently published book of animated graphics.

Each chapter describes the features of one style. It then analyses examples, with well-produced screenshots of sites which are often private and experimental. Then he tells you how to achieve these effects. It’s a very good formula – no matter what you think of the sites.

He’s quite keen on distressed backgrounds and the grunge typography of designers such as David Carson – and he tells you how to create the effects. This will appeal to those who want to make a visual impact. He has favoured designers who he claims have been influential – Mike Cina, Miika Saksi, and a Chicago design group 37signals.

There’s a lot of detailed instruction on how to achieve special effects – most of them done in Photoshop. The general strategy is to maximise visual effects whilst minimising download time. And it has to be said that all the effects are beautifully illustrated, with full pages of elegantly presented coding.

© Roy Johnson 2004

web design   Buy the book at Amazon UK

web design   Buy the book at Amazon US


Curt Cloninger, Fresh Styles for Web Designers, Indianapolis IN: New Riders, 2001, pp.211, ISBN: 0735710740


More on design
More on media
More on web design


Filed Under: Graphic design, Web design Tagged With: Fresh Styles for Web Designers, Graphic design, HTML, Navigation, Usability, Web design

How the Web was Born

June 2, 2009 by Roy Johnson

Readable technological history of Internet and Web

Robert Cailliau’s name was on the original research proposal for the World Wide Web, along with Tim Berners-Lee. This is his account of the development, written with James Gilles. They start with a quick history of the Internet, focussing on the key feature of packet-switching which made the Web possible. Part two switches to the European Organisation for Nuclear Research in Geneva. Here the story becomes one of scientists from all over the world who need to share, archive, and retrieve information. CERN had developed its own Intranet, and by the late 1980s had become Europe’s biggest Internet site.

world wide webAs with most accounts of Internet history, you have to keep up with a complex chronology as the separate stories of each technological strand are developed: the TCP/IP protocols; the development of the PC; and the HCI (human computer interface). Fortunately, all technical terms are explained, and the general reader will be grateful for the appendices which include a timeline, a list of key individuals, a bibliography, an explanation of acronyms, and of course an index.

They include character sketches of all the main figures – Vannevar Bush, Ted Nelson, and Douglas Engelbert, who first thought of Windows, hypertext, and the mouse respectively.

There’s an interesting chapter on the rapid rise and fall of the UK computer industry which in the early 1980s was producing the world’s highest per-capita ownership of personal computers.

They also include potted histories of hypertext, and the pre-web search software such as Archie, WAIS, and Gopher. People who have used these command-line interfaces are likely to look back and smile fondly.

Finally, after all the preliminaries, everything is set for what was to be the killer application of the Internet – the invention of the World Wide Web.

It’s still amazing to think how recent all this has been – only ten years ago – as this second edition of their book is issued on the Web’s birthday.

If you want a history of the Web which is more general than Tim Berners-Lee’s more personal account in Weaving the Web, this is an excellent alternative.

© Roy Johnson 2002

Buy the book at Amazon UK

Buy the book at Amazon US


James Gillies and Robert Cailliau, How the Web was Born, Oxford, Oxford University Press, 2000, p.372, ISBN 0192862073


More on computers
More on technology
More on digital media


Filed Under: Techno-history Tagged With: How the Web was Born, HTML, Techno-history, Technology, Theory, World Wide Web

HTML Tutorial 01 – contents page

November 22, 2009 by Roy Johnson

• HTML – made simple

• HTML – page template

• HTML – common tags

• HTML – common problems

• HTML – adding colour

• HTML – page anatomy

• HTML – questions of taste

• HTML – text & graphics

• HTML – adding tables

© Roy Johnson 2002


Filed Under: How-to guides, Study Skills Tagged With: Coding, HTML, HTML tutorial, Technology, Web design

HTML Tutorial 02 – code made simple

November 22, 2009 by Roy Johnson

1. You can produce web pages using a simple word processor such as Windows NotePad or WordPad. The files you produce should be saved with an .htm extension.

2. The files can contain text, colour, and pictures [even sounds] – but they also contains HTML code.

3. HyperText Markup Language (HTML) uses ‘tags’ to send instructions to a web browser that will ‘read’ the web page. The browser then arranges the appearance of the text on screen.

4. The tags are a code which is placed between angled brackets – <H1> Here is a level one Heading </H1>.

5. Note that the tags are placed around any text you wish to affect. They commonly begin with one tag <H1>, and then they are switched off with another, </H1>, which contains an olbique stroke.

6. <H1>Heading</H1> – shows headings raging from big and bold at size 1 – to 6 – which is quite small.

7. You can also change the size of text on the page from 1 to 6 by enclosing the text between FONT SIZE tags

<FONT SIZE=”4″>produce text size four</FONT>

8. Notice that in this case the numbers 1 to 6 range from small to large.

9. Browsers show text at SIZE=”3″ unless told to do otherwise.

10. You can also change the colour of the text on the page – but note that the tag requires the US spelling of COLOR.

11. The text between the tags will appear in colour:

<FONT COLOR=”RED”>some text in red</FONT>

12. The <P> tag inserts a double space to start a new paragraph.

<P>
Here is the text of one paragraph, which is shown to illustrate the use of the paragraph tag.
</P>
<P>
And this is the start of the following paragraph, which as you can see has been separated from the first with a space.
</P>

13. The <BR> tag forces text to start on the next line down.

Here is a short statement.<BR>
The tag has been used to force the next sentence to begin on a new line.

14. The <HR SIZE=1> tag inserts a Horizontal Rule. The size of the line goes from 1 (most narrow) upwards, with 3 as the default.

15. There are two types of list – ordered and unordered. These are created by using the tags <OL> and <UL>. The first automatically numbers the points in the list, the second creates bulleted points.

16. The items in the list are created by using the <LI> tag. Notice that each point is automatically indented.

17. This is an example of coding for an ordered list:

<OL>

<LI>List item number one</LI>

<LI>List item number two</LI>

<LI>List item number three</LI>

</OL>

This will be show on the screen as follows:

  1. List item number one
  2. List item number two
  3. List item number three

18. This is the coding for an unordered list:

<UL>

<LI>List item number one</LI>

<LI>List item number two</LI>

</UL>

This will be shown on the screen as follows:

  • List item number one
  • List item number two

19. Emphasis is added to text using the BOLD and ITALIC tags, which are shown as <B></B> and <I></I> respectively.

20. Here is some text which is shown in bold and then in italics.

21. You can combine tags – by making text both bold and italic for instance. Here is bold italics.

22. The tags must be correctly nested. That is, they must be added and removed in the correct sequence (or syntax).

<B><I>bold italics</I></B>

23. You can also insert an extra space by using the non-breaking space tag – &nbsp; (which does not come in angled brackets).

no spaces abcdefgh
extra spaces a   b   c   d   e   f   g   h

24. That’s a quick run through some commonly used tags. Here are some general tips on writing the code.

General points

  • You can type tags in upper case <FONT SIZE=4> or lower case <font size=4>.
  • Do not miss out any angled brackets <these> or quote marks “these” – or the code will not work.
  • Do not insert any spaces, as in <FONT C OLOR=RED> or the code will not work.
  • You can combine tags, but they must be correctly nested, as in <B><I>EXAMPLE</I></B>.

NB! This is an extremely simplified account of HTML coding. The appearance of most web pages these days is controlled by style sheets. But the principles shown here are still working underneath.

© Roy Johnson 2002

previousnext


Filed Under: How-to guides, Study Skills Tagged With: HTML, HTML tutorial, Technology, Web design, Web design tutorial

HTML Tutorial 03 – page template

November 22, 2009 by Roy Johnson

1. A basic web page is fairly simple. You should COPY then SAVE the template shown below.

2. Copy the template into a word-processor, then save the file as template.htm.

3. Use a very simple word-processor, such as Windows NotePad or WordPad. Others, such as Microsoft Word, will try to add its own HTM code – and that will be confusing.

4. Then open the file template.htm, add your own text to the page, and SAVE AS filename.htm, where ‘filename’ is a word of your choice.

5. Give it a name, don’t leave any spaces, and use all lowercase letters. That is, avoid using capital letters in web page filenames.

6. You can view the results by opening the page in your web browser.

7. To do this, go to FILE then OPEN PAGE, and type the pathname into the dialogue box. Alternatively, use the Browse feature to locate your file – filename.htm.

8. Don’t type the statements between the square brackets.


<HTML>

<HEAD>

<TITLE>

[ Insert the title of your page here ]

</TITLE>

</HEAD>

<BODY>

<H1>

[ Insert the main heading of your page here ]

</H1>

<P>
[ Start the text of your page here ]

</P>

<P>
[ Insert more writing here ]
</P>

</BODY>

</HTML>


© Roy Johnson 2002

previousnext


Filed Under: How-to guides, Study Skills Tagged With: HTML, HTML tutorial, Technology, Web design tutorial

HTML Tutorial 04 – common tags

November 22, 2009 by Roy Johnson

Tag(s) Function/Name
<P></P> paragraph
<BR> break [new line]
<B></B> bold
<I></I> italics
<H1></H1> heading
<A HREF=”name.htm”></A> hypertext link
<IMG SRC=”name.gif”> link to image source
<HR SIZE=1> horizontal rule
<CENTER></CENTER> centre
<FONT></FONT> font size/colour
<OL></OL> ordered list
<UL></UL> unordered list
<LI></LI> list item
<TABLE></TABLE> table
<TR></TR> table row
<TD></TD> table data

© Roy Johnson 2002

previousnext


Filed Under: How-to guides, Study Skills Tagged With: HTML, HTML tutorial, Technology, Web design tutorial

HTML Tutorial 05 – common problems

November 22, 2009 by Roy Johnson

1. Everybody runs into technical problems when they first create Web pages. Don’t feel bad about it. Just learn from your mistakes.

2. The most common problems are caused by small details and the need for complete accuracy.

3. Filenames must be spelled accurately. They should not contain any spaces, and some keyboard characters – such as /, &, and @ – are not allowed. [These are reserved for transmitting data over the Web.]

4. It is safest to use all lower-case letters. Some computers will treat filename.htm and Filename.htm as different files.

5. Tags must be opened and closed rigorously. If you type the following, it will not work:

<B>Put this in bold<B>

This is because the tag has not been properly closed with </B>.

6. The same would happen if you were to miss one of the angled brackets – <B>Put this in bold /B>.

7. HTML code must be completely accurate. The following examples all contain mistakes:

<A HREF=”filename.htm>filename</A>

<BODY BGCOLOUR=”AQUA”>

<FONT SIZE =”5″>some text here</FONT>

8. In the first example, one double quote mark is missing; in the second the spelling is incorrect; and in the third, there is a space. The correct codes are:

<A HREF=”filename.htm”>filename</A>

<BODY BGCOLOR=”AQUA”>

<FONT SIZE=”5″>some text here</FONT>

9. Missing items. It is very easy to omit a small element of code – especially if you are keying it in manually. For instance if you typed –

<A HREF=”filename.htm”filename</A>

– this would not show up on the screen. In fact nothing you typed after it would appear. That’s because the angled bracket is missing after the file name.

10. Bad syntax. Tags must be opened and closed in the correct sequence. The following is an example of incorrect ‘nesting’ of tags.

<FONT SIZE=5><B>big and bold</FONT></B>

This is the correct sequence:

<FONT SIZE=5><B>big and bold</B></FONT>


previousnext


Filed Under: How-to guides, Study Skills Tagged With: HTML, HTML tutorial, Technology, Web design tutorial

HTML Tutorial 06 – adding colour

November 22, 2009 by Roy Johnson

1. The default background colour of a web page is grey – which is not very exciting.

2. That is, grey is the colour which will show in a browser window unless you tell it to do otherwise. Web design guru David Siegel says that web pages such as this are – “like slide presentations shown on a cement wall”.

3. There are three easy ways to add colour to your pages:

  • use FONT COLOR for text
  • use BACKGROUND COLOR for the page
  • use a graphic for a ‘background wallpaper’ effect

4. Let’s look at each of these options in turn.

The font colour tag

5. When you specify the FACE or SIZE of your FONT, you can also say what COLOR you want it to be.

<FONT=”Arial COLOR=”RED”>my web pages</FONT>

This would produce the following effect.

The words ‘my web pages‘ are coloured red.

6. Other common colours are as follows.

Aqua – Fuchsia – Olive – Green – Lime
Blue – Maroon – Teal – Navy – Purple

Background colour

7. Background colour can be used to give colour to a page.

8. The code is inserted into the <BODY> tag at the top of your page. Notice that the term ‘background’ is abbreviated to BG.

<BODY BGCOLOR=”AQUA”>

9. The problem with most of the standard colours is that they are rather strong. They are too demanding, not quiet enough.

10. It is better to choose something more quiet and restrained.

BGCOLOR=”WHITE” is always safe.

BGCOLOR=”#FFFFEF” is more subtle.

[Don’t ask! Just use “#FFFFEF”.]

11. Note that the tag must be given its American spelling of COLOR. This is a very common technical problem.

Tiled graphic file

12. You can also create a coloured background for your page by using a graphic image. This will be ’tiled’ [repeated to fill the space] by
your web browser.

14. The code goes into the BODY tag at the head of your page. Notice that in this case the full term BACKGROUND is used.

<BODY BACKGROUND=”stripe.gif”>

15. You would save the graphic file ‘stripe.gif’ in the same folder as your .htm page.

16. But a tiled graphic makes reading more difficult. It almost always results in a visually disruptive page.

17. It’s usually much better to use a single colour – one which is muted and subtle. Choose something against which black text will stand out clearly.

18. Here are a good example and a ridiculously bad example.

© Roy Johnson 2002

previousnext


Filed Under: How-to guides, Study Skills Tagged With: HTML, HTML tutorial, Technology, Web design tutorial

  • 1
  • 2
  • 3
  • Next Page »

Get in touch

info@mantex.co.uk

Content © Mantex 2016
  • About Us
  • Advertising
  • Clients
  • Contact
  • FAQ
  • Links
  • Services
  • Reviews
  • Sitemap
  • T & C’s
  • Testimonials
  • Privacy

Copyright © 2025 · Mantex

Copyright © 2025 · News Pro Theme on Genesis Framework · WordPress · Log in